Crispy Baked Chicken Tenders (Simple & Incredibly Juicy)
These crispy baked chicken tenders are golden on the outside, juicy on the inside, and ready in under 30 minutes. A simple chicken tenders recipe the whole family will beg for on repeat.

The Only Crispy Baked Chicken Tenders Recipe You Will Ever Need
Let's be honest: chicken tenders have a reputation problem. They're either deep-fried and heavy, or baked and disappointingly soggy. This recipe fixes that completely. These crispy baked chicken tenders deliver a genuinely crunchy, golden crust and the juiciest interior you have ever pulled from an oven, no deep fryer required.
Whether you are after a quick boneless skinless chicken tenders recipe for a weeknight, looking for dinner recipes with chicken tenderloins that the whole family will love, or just trying to make something better than the freezer bag version, this is your recipe. It is simple, repeatable, and absolutely delicious.
Why This Simple Chicken Tenders Recipe Actually Works
The secret comes down to three things: panko breadcrumbs, a Dijon mustard egg wash, and a wire rack in the oven.
- Panko breadcrumbs are lighter and coarser than regular breadcrumbs, so they create an airy, shatteringly crispy crust rather than a dense, gummy one.
- Dijon mustard in the egg wash adds a subtle depth and helps the coating bond to the chicken like a dream. You won't taste the mustard, but you will absolutely notice the difference.
- Baking on a wire rack allows hot air to circulate underneath the tenders, meaning the bottom crisps up just as beautifully as the top. No more flipping and losing half your coating.
These are the details that separate a good chicken tender from a great one.
Chef's Tip: Always pat your chicken tenderloins completely dry with paper towels before dredging. Any surface moisture creates steam in the oven, which is the enemy of a crispy crust.
Choosing the Right Tools and Ingredients
For recipes like this one, where texture is everything, having the right equipment makes a genuine difference. A sturdy oven-safe wire rack and a reliable instant-read thermometer are the two tools that will take your chicken tender meals from good to exceptional.
How to Make the Crispiest Oven-Baked Chicken Tenders
The process is straightforward, but a few small details are worth paying attention to.
Setting up your dredging station is the most important prep step. You need two shallow bowls: one with beaten eggs and Dijon mustard, one with your seasoned panko and parmesan mixture. Work with one tender at a time, pressing firmly into the breadcrumbs so every surface is fully coated.
The oil spray step is non-negotiable. A light mist or drizzle of avocado or olive oil over the coated tenders before baking is what triggers the deep golden browning you want. Without it, panko tends to stay pale and dry.
Flip once at the halfway point. At about the 10-minute mark, flip each tender gently using tongs. This ensures even browning and a crust that is just as crispy on both sides.
Seasoning Variations Worth Trying
This base recipe is a blank canvas. Once you have it down, try these spins:
- Honey Garlic: Toss baked tenders in a quick honey garlic glaze right out of the oven. Pairs perfectly with simple sides for honey garlic chicken like steamed jasmine rice or roasted broccoli.
- Spicy Buffalo: Add 1 tsp cayenne to the breadcrumb mix and toss finished tenders in your favorite hot sauce.
- Italian Herb: Add dried oregano, basil, and a pinch of red pepper flakes to the panko mixture for a Mediterranean spin.
Chef's Tip: For an even crispier crust, toast the panko in a dry skillet over medium heat for 2 to 3 minutes before using it. The pre-toasted crumbs start the baking process already golden, resulting in an even deeper crunch.
Ready to make them? Here is the full step-by-step recipe:
Crispy Baked Chicken Tenders (Simple & Incredibly Juicy)
These crispy baked chicken tenders are golden on the outside, juicy on the inside, and ready in under 30 minutes. A simple chicken tenders recipe the whole family will beg for on repeat.
Ingredients
- 1 1/2 lb chicken tenderloins, boneless skinless, patted dry
- 1 cup panko breadcrumbs
- 1/4 cup grated parmesan cheese, finely grated
- 1 tsp garlic powder
- 1 tsp smoked paprika
- 1/2 tsp onion powder
- 3/4 tsp kosher salt
- 1/2 tsp black pepper, freshly ground
- 2 large eggs, beaten
- 1 tbsp Dijon mustard
- 2 tbsp olive oil or avocado oil spray, for drizzling or spraying over tenders before baking
Instruction
Preheat your oven to 425 degrees F (220 degrees C). Line a large baking sheet with a wire rack and lightly spray both with cooking spray. Using a wire rack is key for all-around crispiness.
Pat the chicken tenderloins completely dry with paper towels. This step helps the coating stick and ensures a crispier crust.
In a shallow bowl, whisk together the beaten eggs and Dijon mustard until smooth and combined.
In a separate shallow bowl, stir together the panko breadcrumbs, grated parmesan, garlic powder, smoked paprika, onion powder, salt, and black pepper until evenly mixed.
Working one at a time, dip each chicken tenderloin into the egg mixture, letting any excess drip off, then press firmly into the breadcrumb mixture on all sides. Place on the prepared wire rack.
Lightly spray or drizzle all the coated tenders with olive oil or avocado oil. This helps the panko turn deeply golden in the oven.
Bake for 18 to 22 minutes, flipping once halfway through at the 10-minute mark, until the crust is deep golden brown and the internal temperature of the thickest tender reads 165 degrees F (74 degrees C) on an instant-read thermometer.
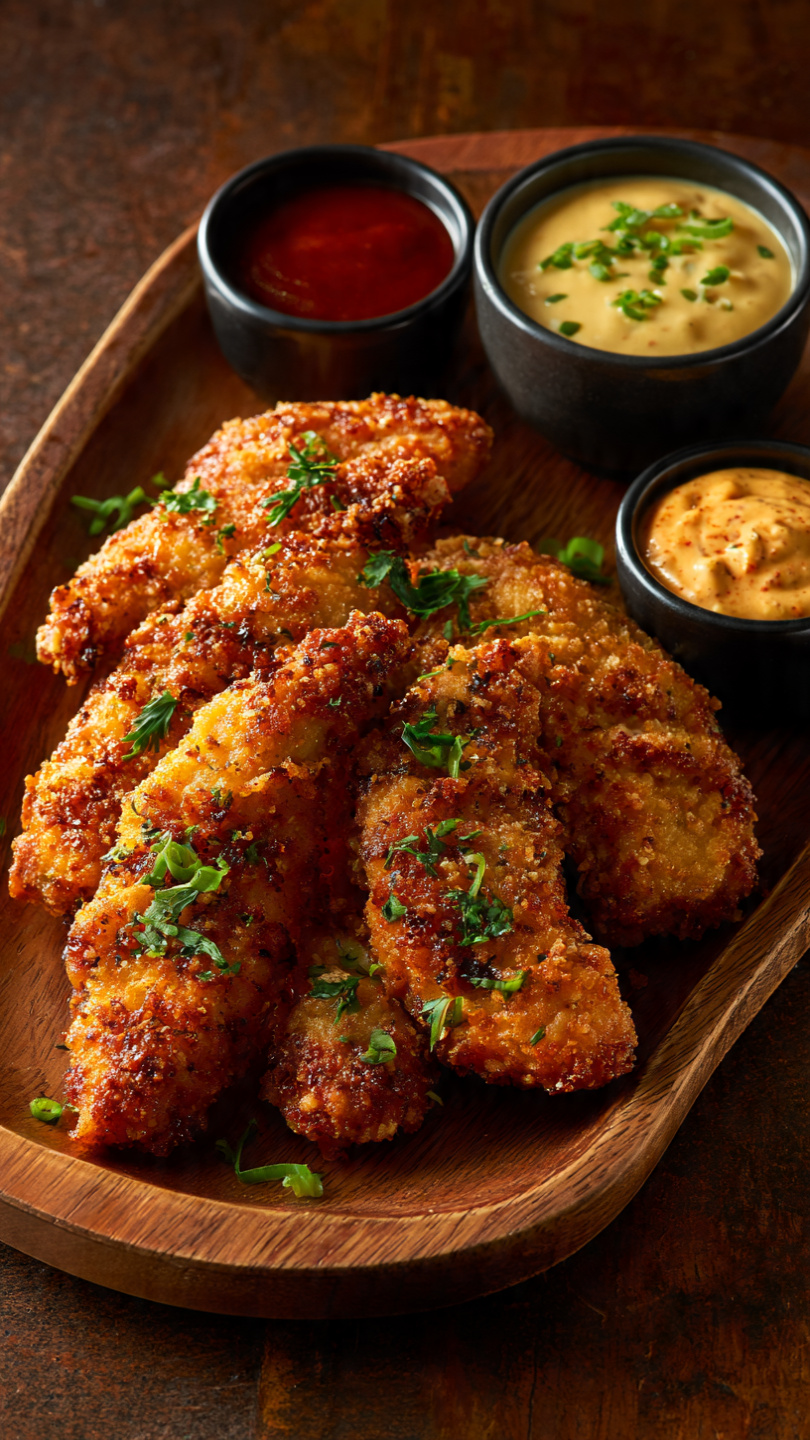
Remove from the oven and let rest for 3 to 5 minutes before serving. Serve with your favorite dipping sauce.
Equipment
- Large rimmed baking sheet
- Wire cooling rack (oven-safe)
- 2 shallow bowls for dredging
- Instant-read meat thermometer
- Tongs
- Cooking spray or oil mister
Notes
Serving, Storing, and Making Ahead
These chicken breast tenderloin recipes oven style are as practical as they are delicious.
For serving: Arrange on a platter with dipping sauces like honey mustard, ranch, BBQ, or sriracha mayo. They are equally at home on a dinner plate alongside roasted veggies or tucked into a wrap for lunch.
For storing: Leftovers keep in the fridge for up to 3 days. Reheat on a baking sheet at 375 degrees F for 8 to 10 minutes to bring the crunch back. The microwave will make them soft, so skip it.
For meal prep: These are one of the best recipes to make with chicken tenders if you are planning your week ahead. Bread the tenders up to 8 hours in advance and refrigerate them uncovered on the wire rack. Bake right before dinner.